Category Archives: Uncategorized

May 2016: Composite Fiber Angle Measurement using FFT in MATLAB

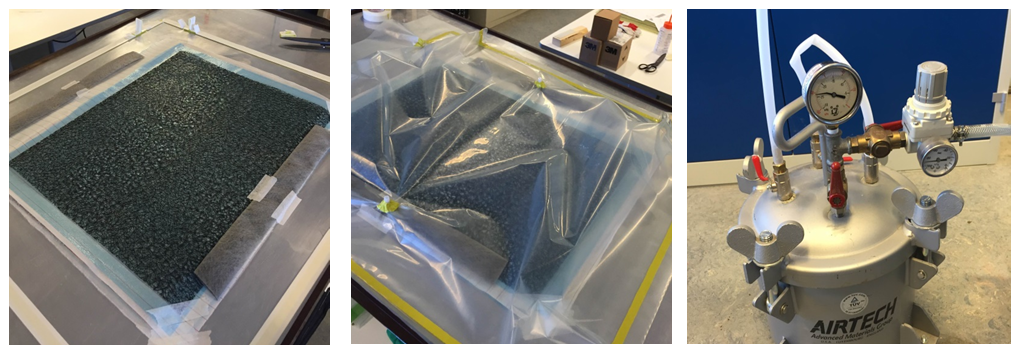
In order to calculate precise stress tensors from Classical Lamination Theory, we need a very accurate way to measure the angle of fibers in the flax composites we are testing. Building upon the work of Yosuke Ueki, I have developed a methodology with which to do this using the Fast Fourier Transform.


(1) Take a high quality image, using a light table and a standard 35mm high megapixel camera (I used the Sony a7rii)

RSK0208

(2) My MATLAB program squares the image, trims the edges and takes the image intensity (grayscale image).

biaxial_img_intensity

(3) MATLAB already has FFT functions built in. I’m not going to get into this here, but if you don’t know much about Fourier Transforms there is a wealth of information online, including a super great MOOC through Stanford University. The coolest part (I think) is that this technique was first proposed in the early 1800s for solving the heat equation, but was re-popularized almost 200 years later(!) because of what internet technologies have required in terms of signal processing. Math! wow!

example_fft

(4) From here, we can build a histogram of the fiber angles at each point. In this example, the biaxial fabric orientation is (+52.4, -51.8) degrees. We can also use this data to compare the variance in fiber angle across different manufacturing techniques, but we must use caution as you can see there is a bit of noise. I haven’t used any filters here, but one of the nice things about FFT is the capability to use filters on the image. (I do use a high-pass filter when I calculate average fiber angle.)example_hist


TLDR: FFT a simple-enough, super-quick way to measure fiber orientation in a composite laminate without any high-tech equipment- just using an ordinary camera and a light table.

February 2016 (2) – the “un-making” of uniaxial flax fabric (video)

This week, I’ve sort of reverse-engineered a uniaxial composite plate from this biaxial (angled) fabric. This might seem like a waste of time, so allow me to explain: With the variation between batches of flax fiber yarn, it’s important for the “control group” to be made of the same exact fibers as the testing groups. In this case, we are testing the effect of yarn angle on strength and stiffness. So for the control group, we want to use fabric from the same exact roll as the angled fabric in our test group. Here’s what I’ve done this week:


[youtube]https://youtu.be/GRsrNSnMcTc[/youtube]

February 2016: Flax Composites at DTU- Vacuum infusion process

I’m at DTU (Technical University of Denmark) for a few months to study the strength and failure mechanics of flax composite laminates. In the first few weeks, I am doing lots of fabrication- something they really excel at here. This is called the vacuum infusion process, which is the same process used for most commercial wind turbine blades.

flax_manuf_1

From left to right:

  • Biaxial (+/-45 degrees) non-crimp (aka non-woven) flax fabric, with polyester stitches to keep the flax aligned.
  • The fabric is cut into rectangles, 50cm x 70cm (this takes a very long time because it’s tough to cut through and finicky to measure)
  • A stack of rectangles is placed between some “distribution media”. Distribution media is disposable material which helps to distribute the resin (aka matrix aka adhesive) evenly over the entire composite, since it will enter the stack at only one spot.

flax_manuf_2

  • Even more distribution media, including felt/plastic channels for the inlet and outlet tubes where resin will flow.
  • A “vacuum bag” (not a bag, actually just a sheet) is taped over the top of the whole stack. It’s really important to get rid of any gaps, but the yellow tack used to adhere it to the aluminum table is very forgiving.
  • A vacuum pump connects to this aluminum canister so that when excess resin gets drawn into the line, it drips into the aluminum canister and won’t get drawn into the vacuum.

flax_manuf_3

  • The vacuum pump is hooked up to the outlet side of the bag with the inlet plugged, and we do a vacuum test to make sure there are no gaps where air may escape to the atmosphere. Having a break in the seal is super common and will ruin all of your hard work so this step is taken very seriously.
  • After the vacuum test, the inlet is unplugged and resin is allowed to flow into the system by the pressure differential created by the vacuum.
  • When the resin has saturated the entire sheet the inlet is clamped. About half an hour later, the outlet will be clamped and the vacuum stopped. Then, it cures for about 24 hours at elevated temperatures. These temperatures may be reached either by using a heated surface (like the aluminum surface above) with a heating blanket on top, or by using a glass surface which can be placed in an oven.

___________________________________________________________________________________________________

Here’s a quick time-lapse of the resin travelling through the fiber stack towards the outlet tube. This 12 seconds of video represent 2-3 minutes in real life. Natural fibers are able to soak with resin much more easily than carbon or glass, which is a processing advantage because the process is faster and less susceptible to errors like air bubbles.

___________________________________________________________________________________________________

flax_manuf_4

  • After 24 hours of curing (and a few extra for the laminate to cool off), the vacuum bag and distribution media are removed and thrown away. Though flax fibers can be considered much more sustainable than glass fibers, vacuum infusion (used commonly for both glass/carbon and natural fibers) is by no means a sustainable manufacturing process. Many disposable plastics are used once and then have to be thrown away because they’re soaked with resin.
  • The final plate has some warping and this is normal. The blackened color is just the cured resin. That itty bitty ruler is 40cm in length.
  • Zoomed in, you don’t see the black color so much. It looks basically like when we started but shiny because it’s coated in a sheet of resin. And of course it’s super rigid and 8 layers thick!

The end.

October 2015: Wood Laminates in Tension and Compression

We’ve moved on from torsion testing because we believe that our test setup is not accurate enough to measure true strength. We are continuing small torsion testing this semester… more information to follow!

In the meantime, we spent the summer and early fall months fabricating and testing 4-ply, symmetric wood layups in tension and compression.

The layups were oriented at 0, +/- 30, +/-45, +/-60, and 90 degrees from the testing direction (vertical axis). This data should inform yield theories, which combine different stress components to predict material yielding. For example, a +/-60 degree specimen would have relatively low sigma1 (stress in the grain direction), relatively high sigma2 (stress perpendicular to the grain direction) and a moderate sigma12 (shear stress). We hope to incorporate these improved yield theories into modelling of laminated wood, then use these improved models to inform turbine blade design.

Here are a few photos of the fabrication and tests (click any to enlarge):

manuf_process_square

The fabrication process begins with cutting single veneers at the desired grain angle (a). From there, large sheets (60″x 20″) are laminated using T-88 structural epoxy (b). The laminate is pressed (c) in a hydraulic press fixed with CLT (cross-laminated timber) panels to eliminate fiber waviness. Finally (d), specimens are cut from the panels using a CNC router.

IMG_4153

Specimens are then tested in tension…

IMG_4061

… and compression.

IMG_4176

Tensile tests were highly reproducible, showing many gauge-length failures and low COV in both strength and stiffness.

April 2015: preliminary torsion test results


First figure: Results from our first 13 torsion tests, showing a clear difference in torsional elasticity between unidirectional and angle-ply specimens.

prelim_results


Second figure: Drawing attention to the lack of catastrophic failures in the unidirectional specimens. This was a limitation of the test configuration; at high twist angles, the steel clamps would slip off of the wood blocks.

lack_of_UD_failures


Third figure: A closer look at the variation in peak torque measurements for the angle-ply specimens. The highest-torque specimen shows a failure surface which indicates a rolling shear failure, while the lowest-torque specimens shows an almost entirely glue bond failure (evidenced by one surface being quite shiny, while the other surface is totally dry). It’s important to note that this “glue failure” is not a result of the adhesive itself, but rather of the manufacturing process.

ap_torque_variation


Thoughts:

1. The rolling shear response is interesting, is unique to wood because of wood’s high volume fraction when used as a composite laminate, and has not before been documented in torsion tests.

2. It’s unclear at this point if a rolling shear response would actually happen in a wind turbine blade, or if it is unique to this torsion configuration. Finite element analyses (in progress) will lend some insight to this question.

3. If the rolling shear response is possible in the wind turbine blade, a refined version of this test would be a good way to characterize the rolling shear response of angle-ply laminates (which has not been done before). If the rolling shear response is not possible or likely in turbine blades, the more interesting project would be to reinforce the ends and see what the in-plane (rather than through-thickness) response is like. Connections/Joints may also be an interesting area to explore.

June 2014: compression wrinkles

This is what compression wrinkles look like on my torsion specimens!!

IMG_1302(click to enlarge)

This (compression failures on the exterior faces) is what my model predicted would happen. We actually didn’t notice them until the specimen had been loaded to 450lbs, unloaded (because it slipped off the bearing blocks) and reloaded back to 490lbs. Next time we’ll look closely for them in the static test. Pretty cool though!


June 2014: rolling shear! cool! :D

rolling_shear_failure(click to enlarge)


Rolling shear failure at 603 N-m. Can’t wait to test more on Monday!

The difference with these specimens as compared to the first is that (1) they were pressed under higher clamping pressure, achieved by applying more mechanical force using the press and limiting the number of specimens in the press at one time to 2 specimens, and (2) applying adhesive to both surfaces, rather than one surface per joint. Hopefully the next ones come out like this too! Cross fingers for Monday.

May 2014: delamination :(

we ran our first round of torsion tests on our custom angle-ply wood laminates.

the good news: they were remarkably consistent, with a peak torque varying from 180-220 N-m, as seen below. coefficient of variation only 7.1%

torque_disp_1 (click to enlarge)

the bad news: this result indicates a substantially lower failure torque than predicted. even the unidirectional specimens should go to 290 N-m and these should be higher, in theory

the failure characteristics: delamination- kind of. it was definitely a glue line failure, but upon cutting the specimen open it seemed that the bond was dry and had only adhered in patches- this is called a starved joint, where there is not enough adhesive or not enough clamping pressure to allow the adhesive to fill in the gaps. and the angle-ply laminates probably have more gaps than the unidirectional laminates because of lathe checks, also.

the analysis: the roughness of the raw material, and especially the lathe checks, make the angle-ply veneers especially difficult to join. going forward, the plan is to try three different adhesives (including the one we used here), to apply the adhesive to both sides of each joint instead of one side, and to increase the clamping pressure by using more mechanical force and limiting the batch size to 2 specimens at a time in the press.