

Welcome to our weekly update of the house building journey! Last week was filled with challenges, triumphs, and moments of unexpected downpour, all contributing to the continuous growth of the Paper House. Join us as we recount the highlights of each day, as we venture into the realms of plumbing, insulation, and windows.
The week kicked off with a final trip to Greenfield, where we disassembled our design-build stage (mentioned in the previous post). We got everything down and loaded up in under 3 hours! In order to try to make next year’s job as easy as possible, all the elements of the stage were labeled with their location, orientation, and purpose. The stage parts found a temporary resting place near the UMass campus, albeit in an eerily abandoned area close to the police station. After lunch, we encountered an unexpected rainstorm, trapping us inside the house. However, we embraced the situation by using the time to discuss paint colors for the house exterior, trim, and door. Since the Hygge House and the Paper House will be a duplex, we decided that harmonizing the colors was the best way to maintain visual cohesion. Furthermore, Diana received a generous donation from Fireclay Tile, which will adorn our future bathroom and kitchen. Heartfelt thanks to Diana!


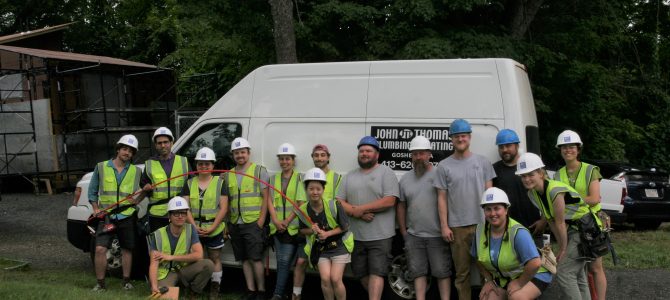
On Tuesday, John Thomas Plumbing and Heating visited us, executing (with our assistance) the setup of the plumbing supply and waste connections. Plus, a Radon remediation system, as well as the line set for the Air Source Heat Pump (ASHP). Under the guidance of Noah from John Thomas Plumbing and Heating, we learned the art of insulating pipes and began applying the insulation sleeves. (Carl graced us with the two most important rules for plumbing: 1. Hot on the left and cold on the right. 2. S–t flows downhill.) Meanwhile, a few team members began to build the rake and eaves overhangs, a tedious, exhausting, and challenging process. Discussions on bathroom and kitchen tiles began, setting the stage for further visualization of the aesthetic aspects of our home. Our exterior insulation—3 inch thick foil covered repurposed polyisocyanurate (polyiso) foam board—was delivered on that day donated by Green Insulation Group, allowing us to start screwing it onto the sheathing. Any inadvertent punctured holes in Zip Walls, were diligently sealed with Zip Tape. We cut the foam using long (5 and 6 inch!) jigsaw blades, as the circular saws are just not deep enough to cut these 3 inch thick panels. We were careful to leave a space between the panels of foam where the upper sections will need to be removed for transport. We also avoided the window and door openings while insulating to make it easier to attach our flange windows, bucks, etc. Some parts of the foam were filled in with low expansion spray foam, the application of which is critical as too much can push the insulation right off the sheathing. Furthermore, we ensured the windows and doors were protected with plastic sheets, defending our interior.


So why are we insulating on the outside of the house? Our main enemy is water, which can enter the house in a variety of ways, one being condensation. Condensation forms when the water in air is cooled to its dewpoint. In cold weather the outside of the walls get cold, meaning the interior side of the exterior sheathing (the first condensing surface) would also get cold enough to condensate the interior air’s humidity if it migrated to the exterior. The exterior insulation raises the temperature of that vulnerable surface so the risk of condensation is minimized. Monitoring how this works over time as the house is occupied will provide very interesting and important. Diana installed sensors in cavities on the four elevations and two roofs in an effort to use the Paper House as a case study to examine the hygrothermal performance of our assemblies. The sensors will monitor the interior assembly conditions: temperature, relative humidity, moisture content, etc. Additional sensors monitor interior conditioned space and exterior weather conditions. The data will then be analyzed to determine if any negative issues appear. This is of special interest to understand and evaluate the performance of our Hemp Based Cavity Insulation, as it is a non-traditional bio-based insulation material.
The insulation effort continued into Wednesday, transforming our house into a metallic-covered baked potato. Meanwhile, other students continued to build and install the overhangs. One of the windows found its place beside the front door, giving natural lighting to the students working inside on adding blocking between the wall framing for cabinetry, towel bars, grab bars, as well as installing a recessed shower shelf. We also began creating our window bucks, which will allow us to extend our draining surface from the window sill out over the insulation.

On Thursday, Ben and Amir began setting up the Energy Recovery Ventilation (ERV) Systems in the second bedroom’s loft, guaranteeing optimal fresh airflow throughout the Paper House. Meanwhile, the work on overhangs was (exhaustingly) continued. Other team members cut and assembled the bucks—wood frames that provide delineation between window and adjacent insulation This requires the construction of a precise and accurate surround for the window itself. As a team, we gathered to plan the positioning of switches and outlets, using gray and red duct tape to visualize the electrical layout. For example, we had a long talk about the five switches in the bathroom; encompassing overhead light, shower light, vanity light, ERV Boost Switch, and heated floor temperature control.

The week concluded on a high note as we welcomed a representative from SIGA, John Rockwell, who instructed us on the effective use of high performance tapes with their high performance adhesive that ensures an air, wind, and weather tight building envelope. John demonstrated how to apply some of these tapes for use in window installations and the team was able to learn about some cool new products like preformed tape corners as well as the membrane air barrier and vapor retarder Majrex. John also told us about the importance of a well thought out ERV system, and worked with us on some questions we had on locating the fresh air intake and stale air exhaust vents. SIGA’s generosity extended to providing us with much-needed SIGA squeegees and utility knives (Amir secretly took a few extra squeegees). Our focus for the day was the installation of all windows, albeit with some challenges in maintaining precise buck sizes. The ongoing process of attaching insulation onto the sheathing continued, further transforming our house into that foil-covered baked potato. Exhausted but satisfied, we welcomed a well-deserved four-day weekend, recharging our energy for the weeks to come.


As we continue to build the Paper House, stay tuned for more updates on the progress and challenges we encounter along the way.