Anglo-Saxon Lyre 4 (New Lyre)

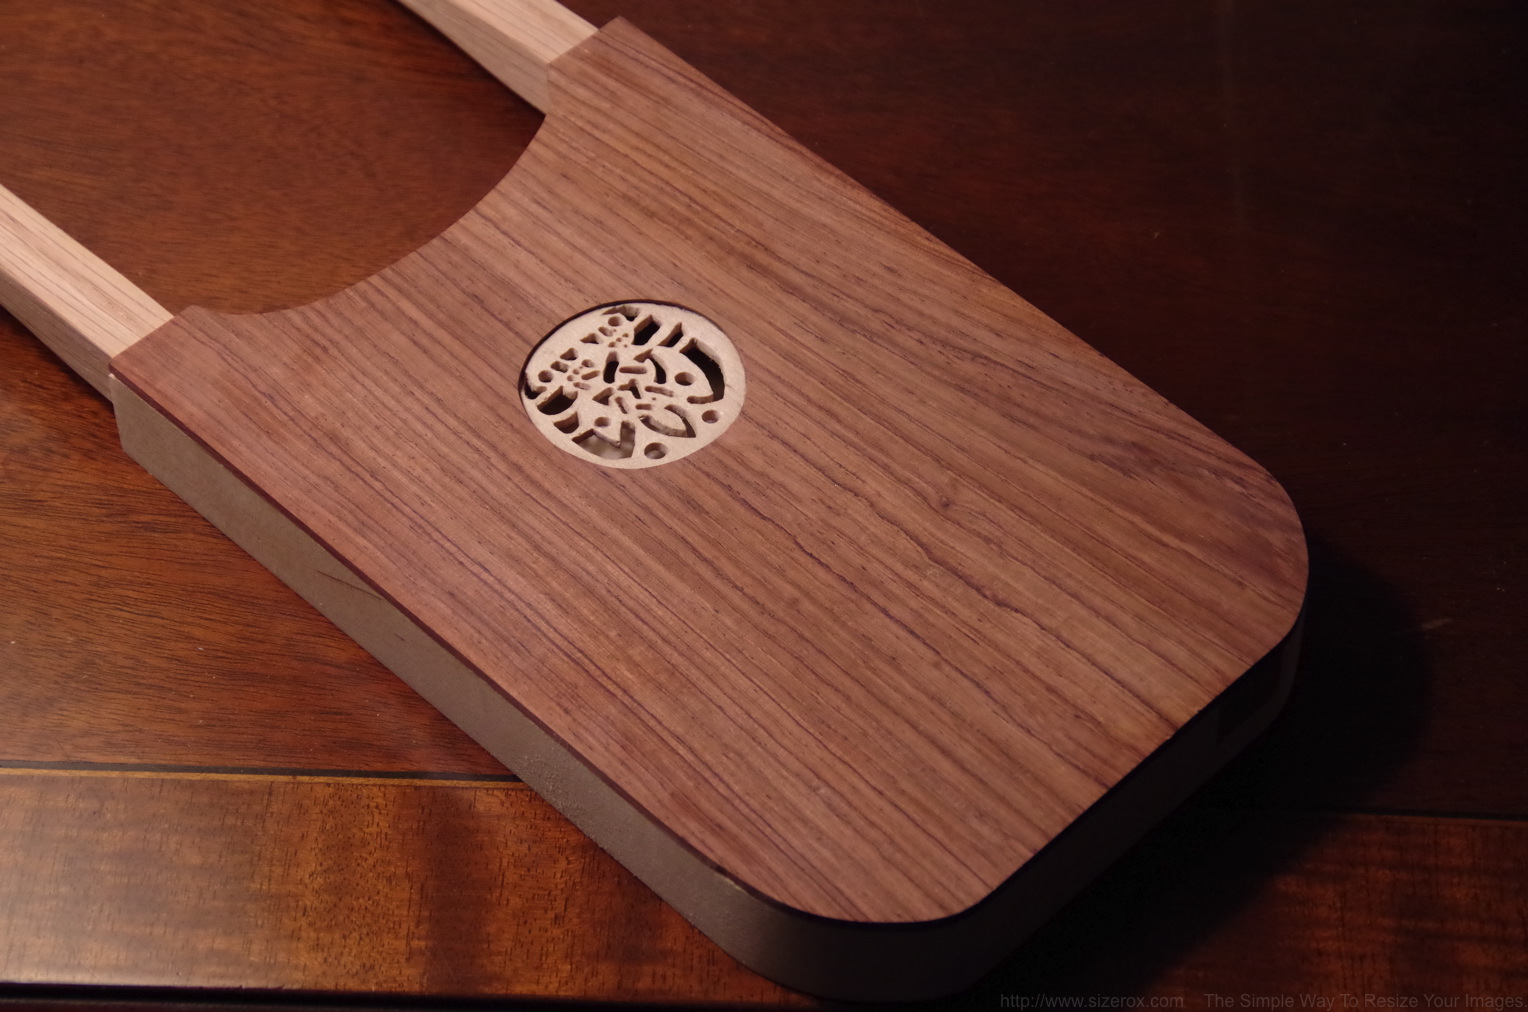
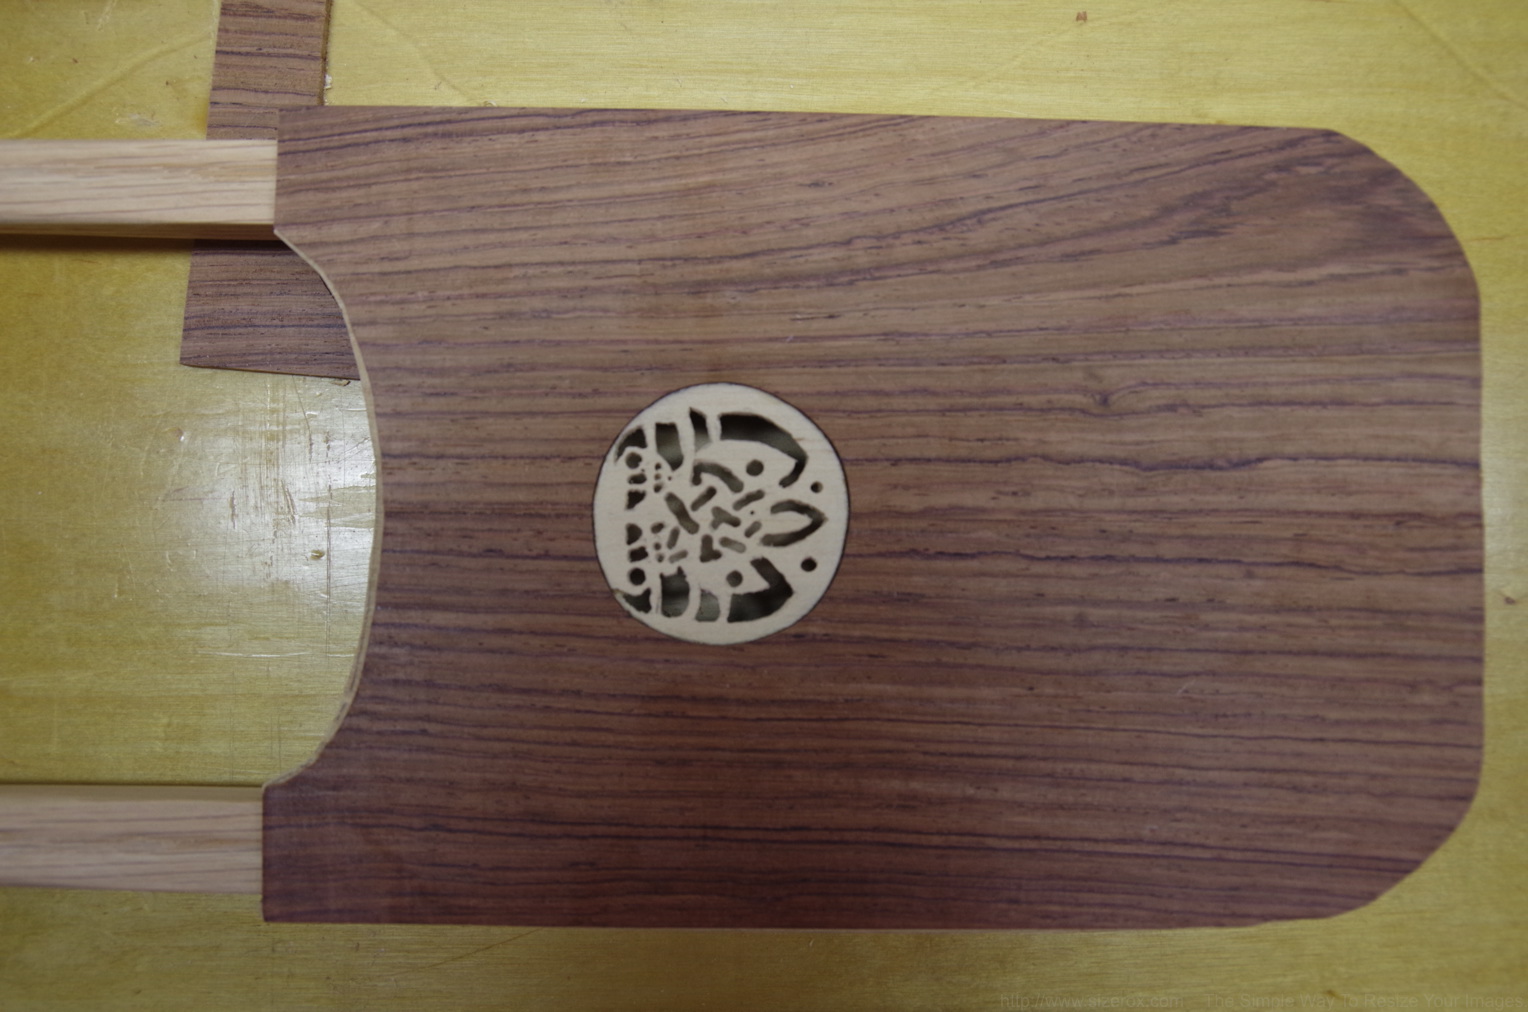
The Serpentine Lyre.

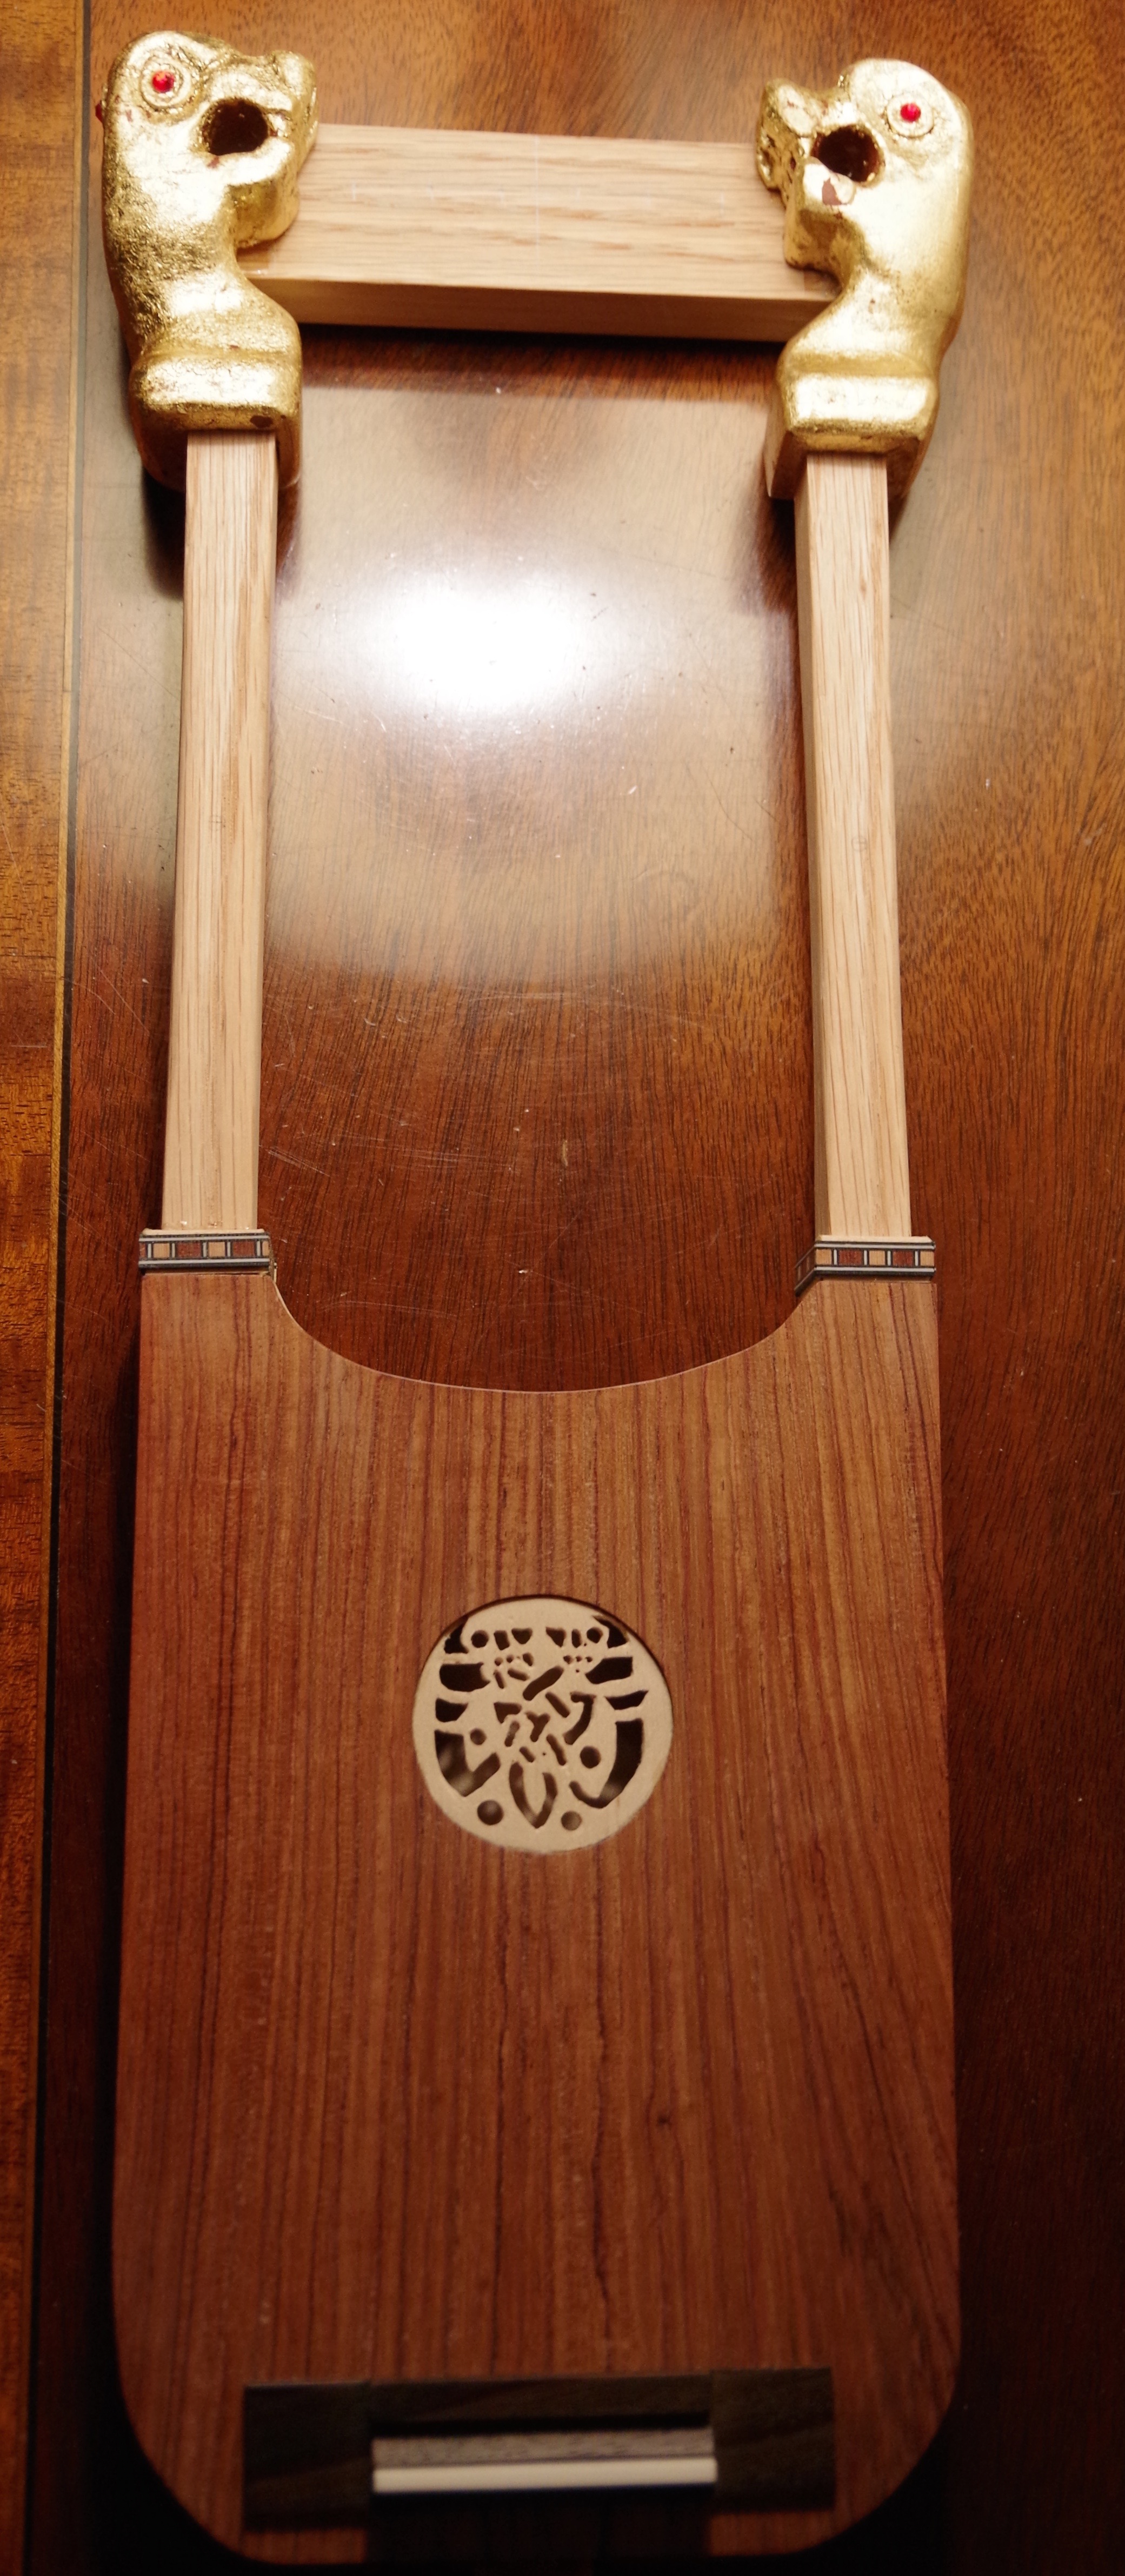
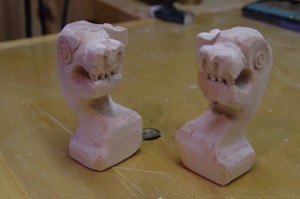
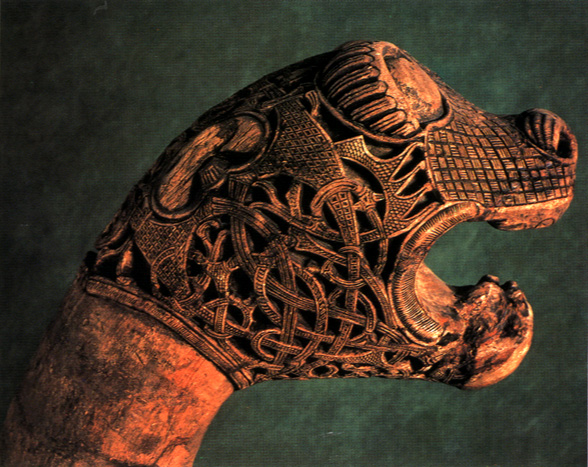
The second lyre is named for the interlace pattern on its headstock. The last lyre had two dragon heads, so it’s the Dragon-head lyre. Simple. Number Two is made completely of mahogany. The Sutton Hoo lyre was oak and had no sound holes. So, it seems as if the original makers relied on the sonority of the box itself to carry the sound waves. That means paying close attention to grain direction and keeping the joints tight. I decided on a frame, much like a tortion box, but with the head stock exposed.

The frame is 3/4″ x 3/4″ mahogany. There are two main points of potential warp: torque on the cross-beam and tilt on the base. The headstock is so heavy and the string pins so thick that tilt is unlikely there. So, joinry type will be chosen to account for that.

Click on any picture to enlarge it.

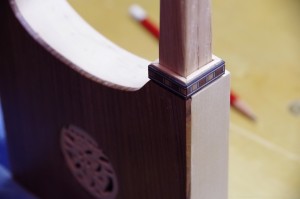
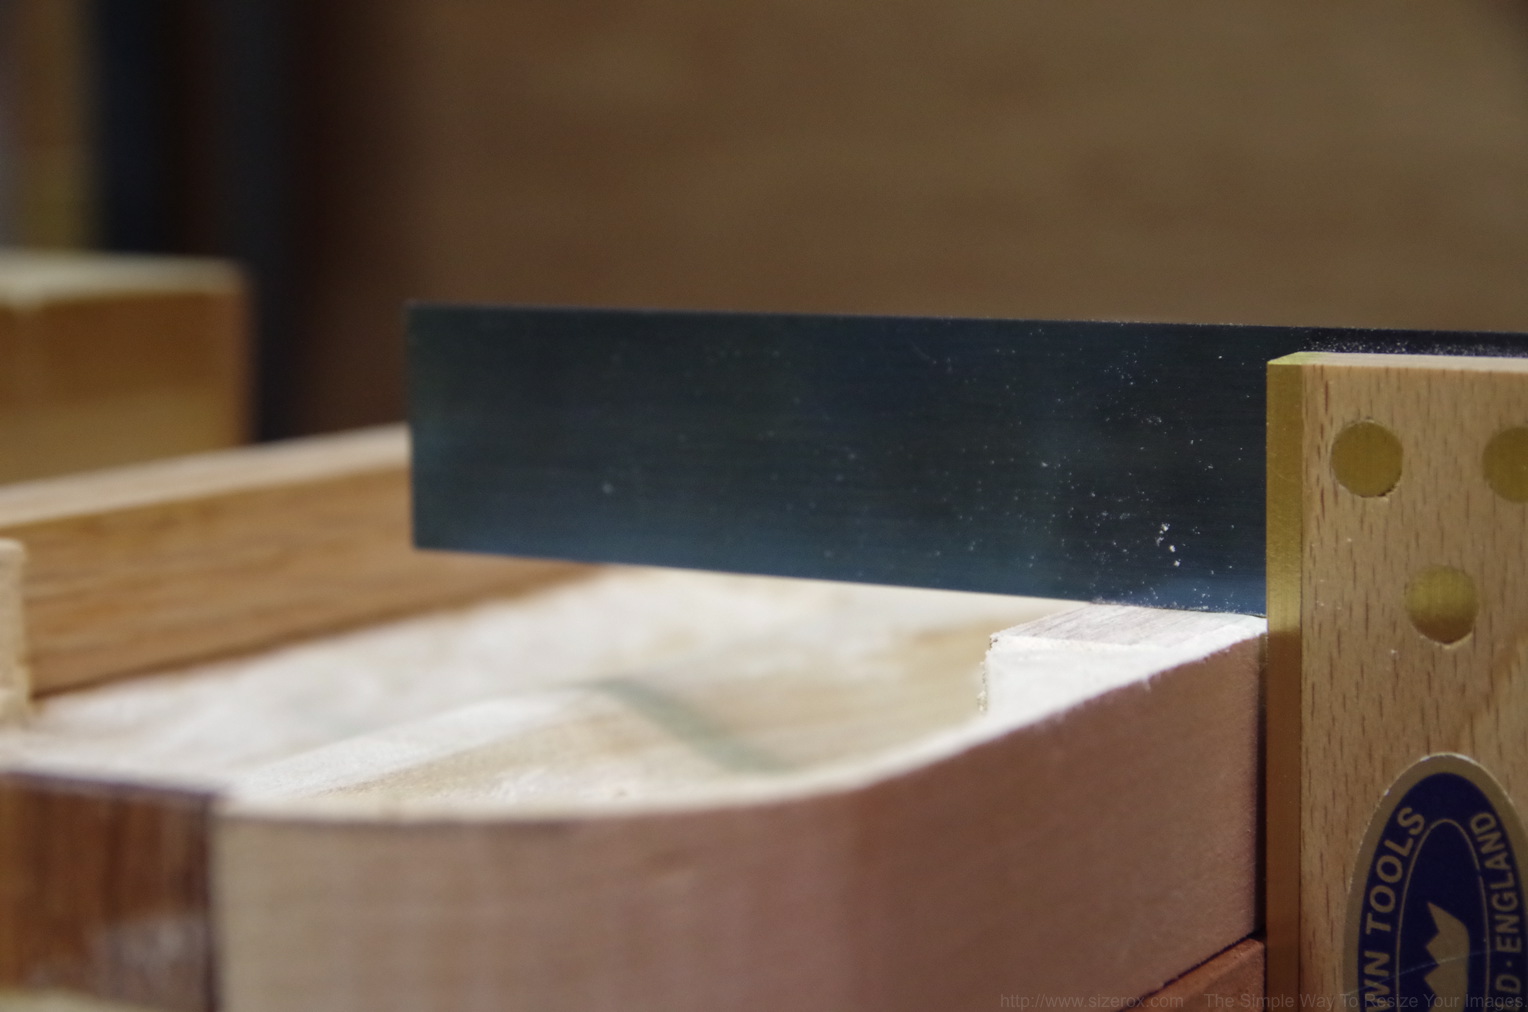
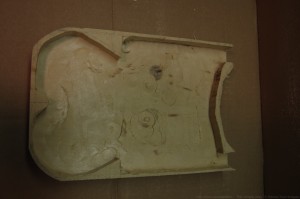
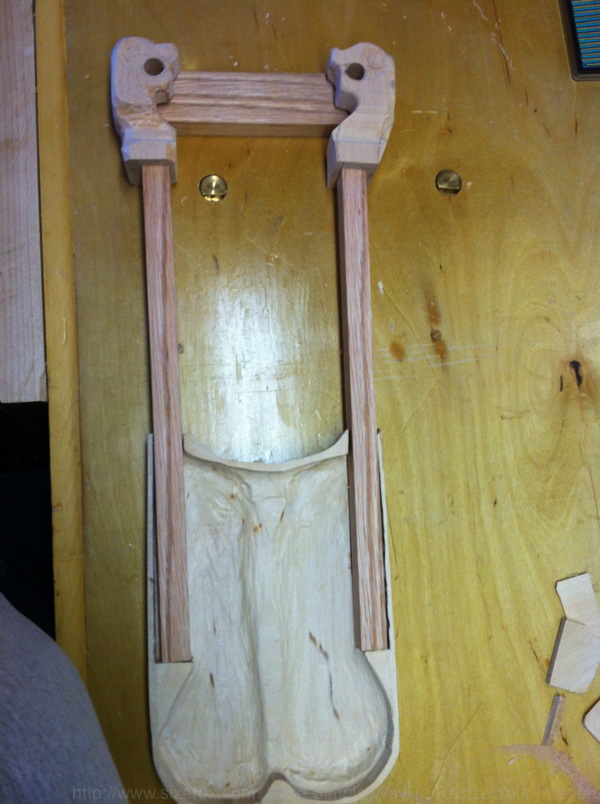
The main crossbrace is joined with a through-tenon. If it is seated in the mortise well, then the brace won’t tilt (or roll) forward or backward, causing the lyre’s skin to buckle.

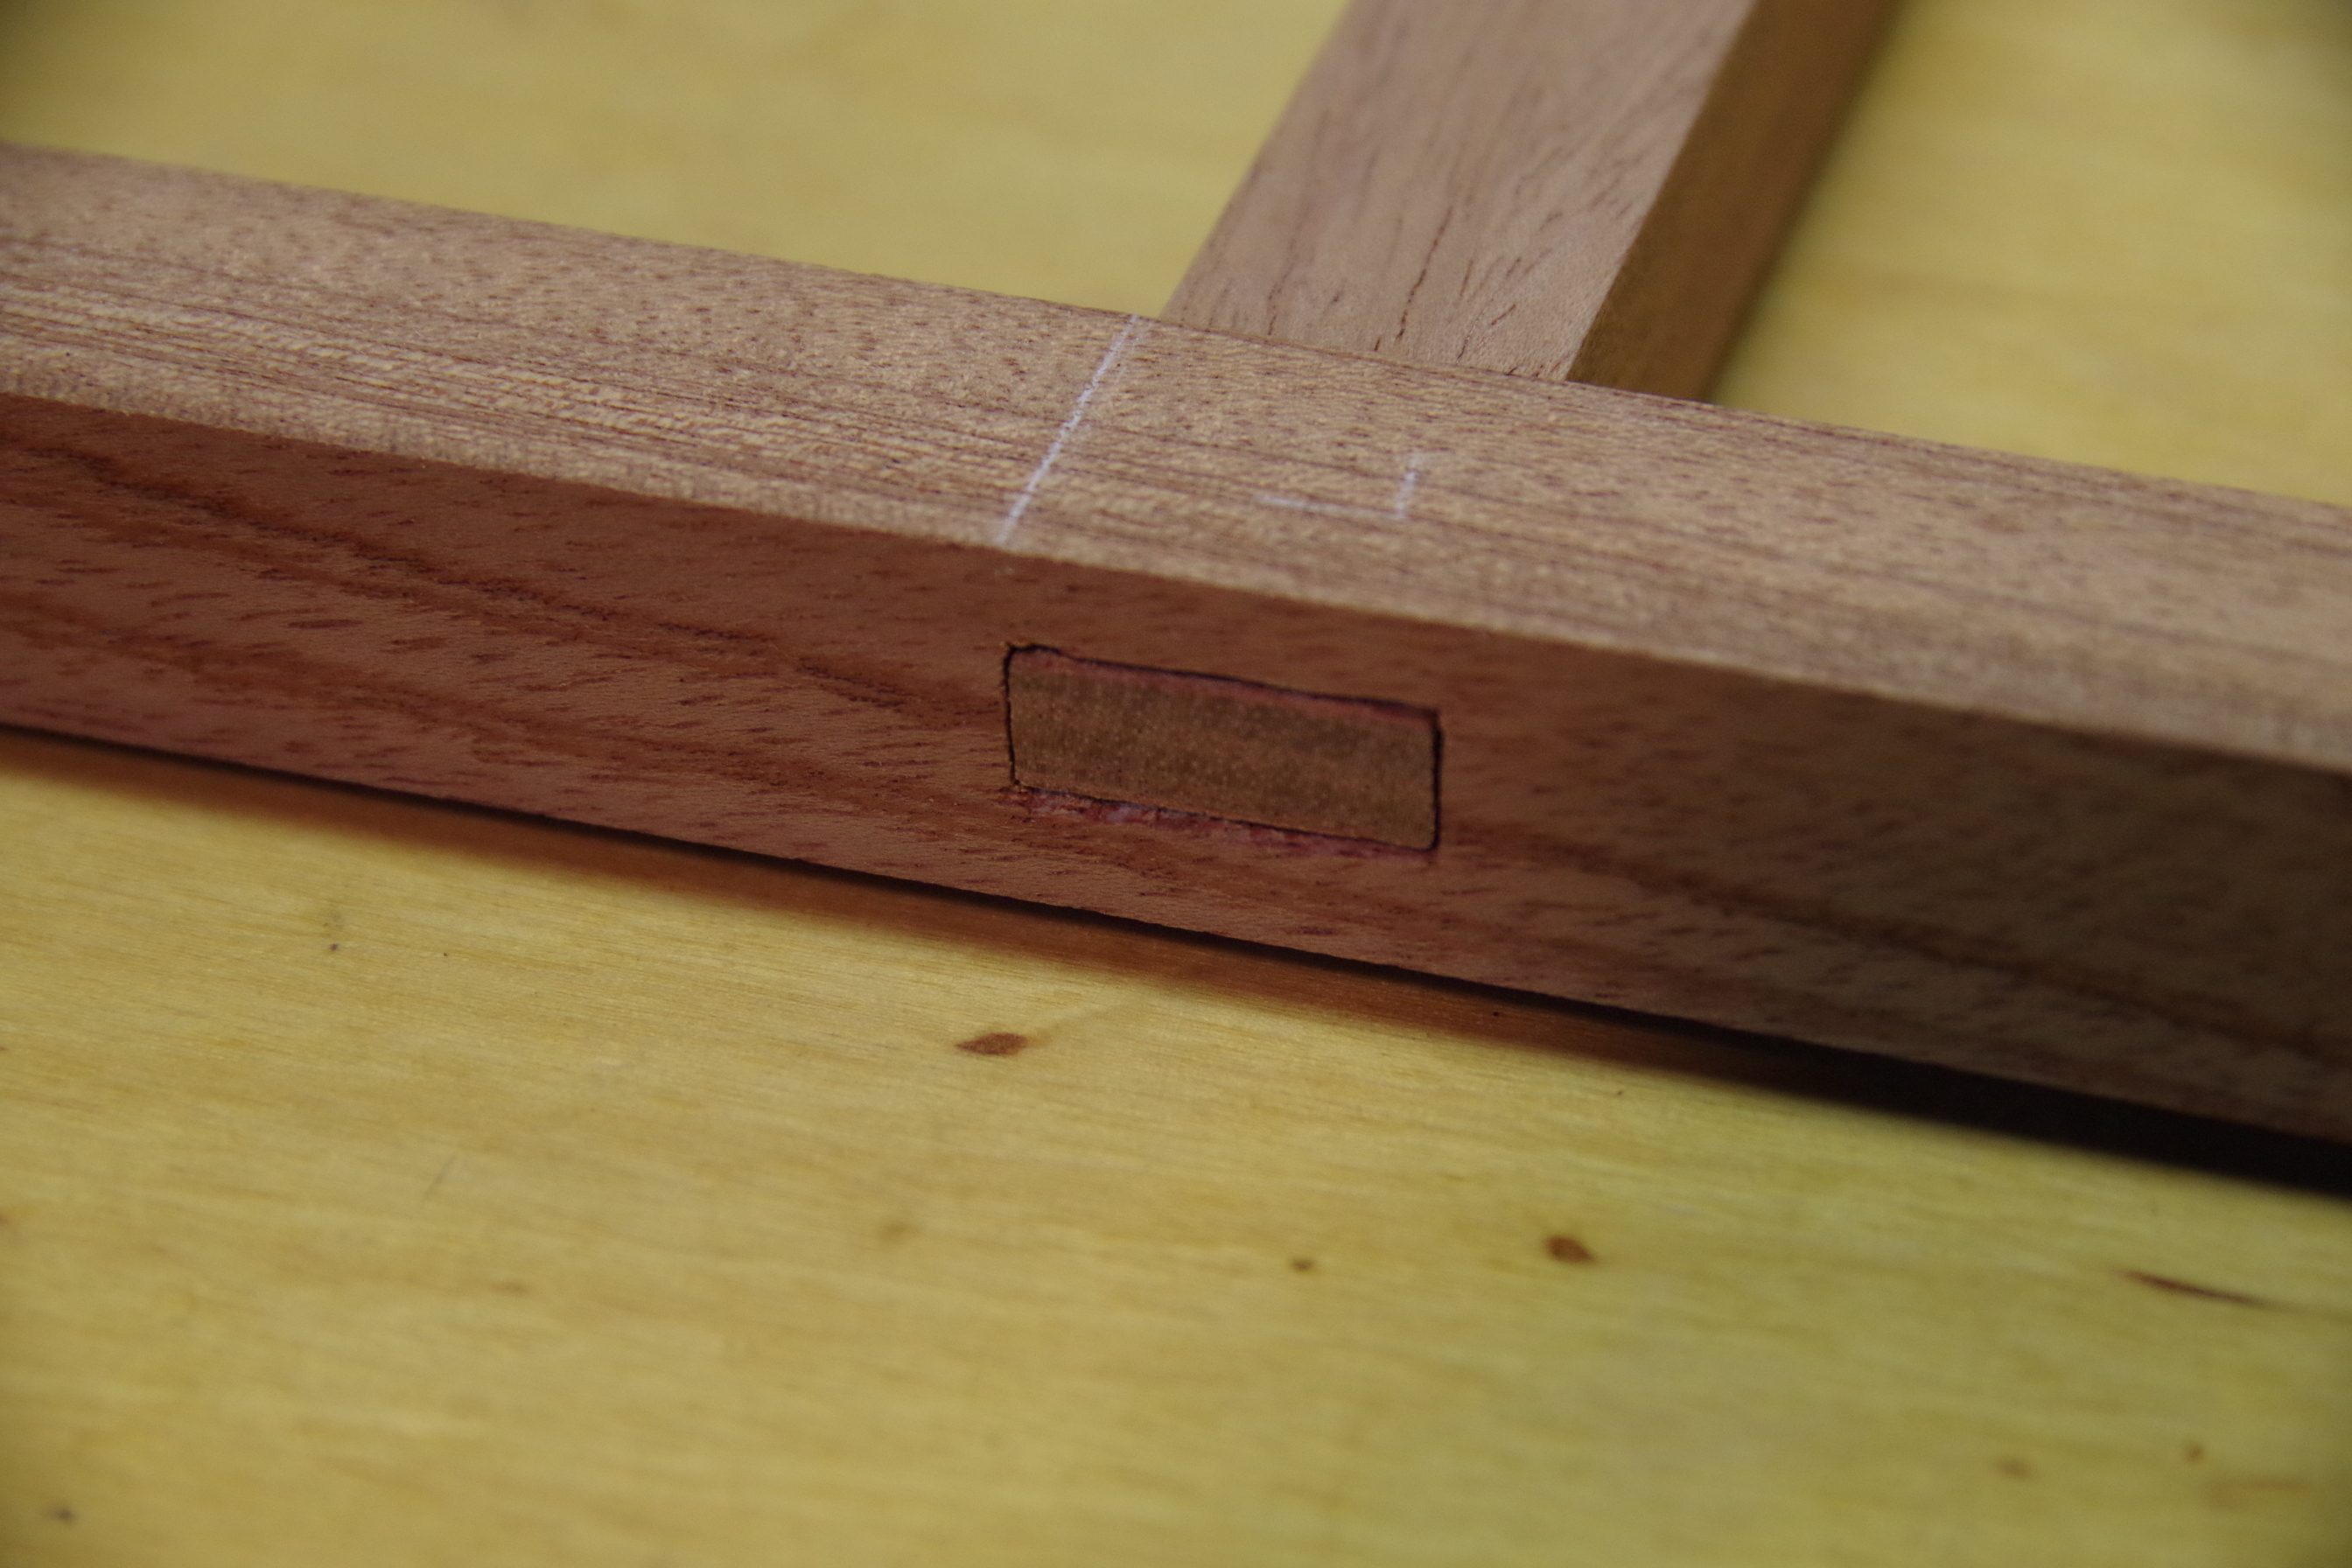
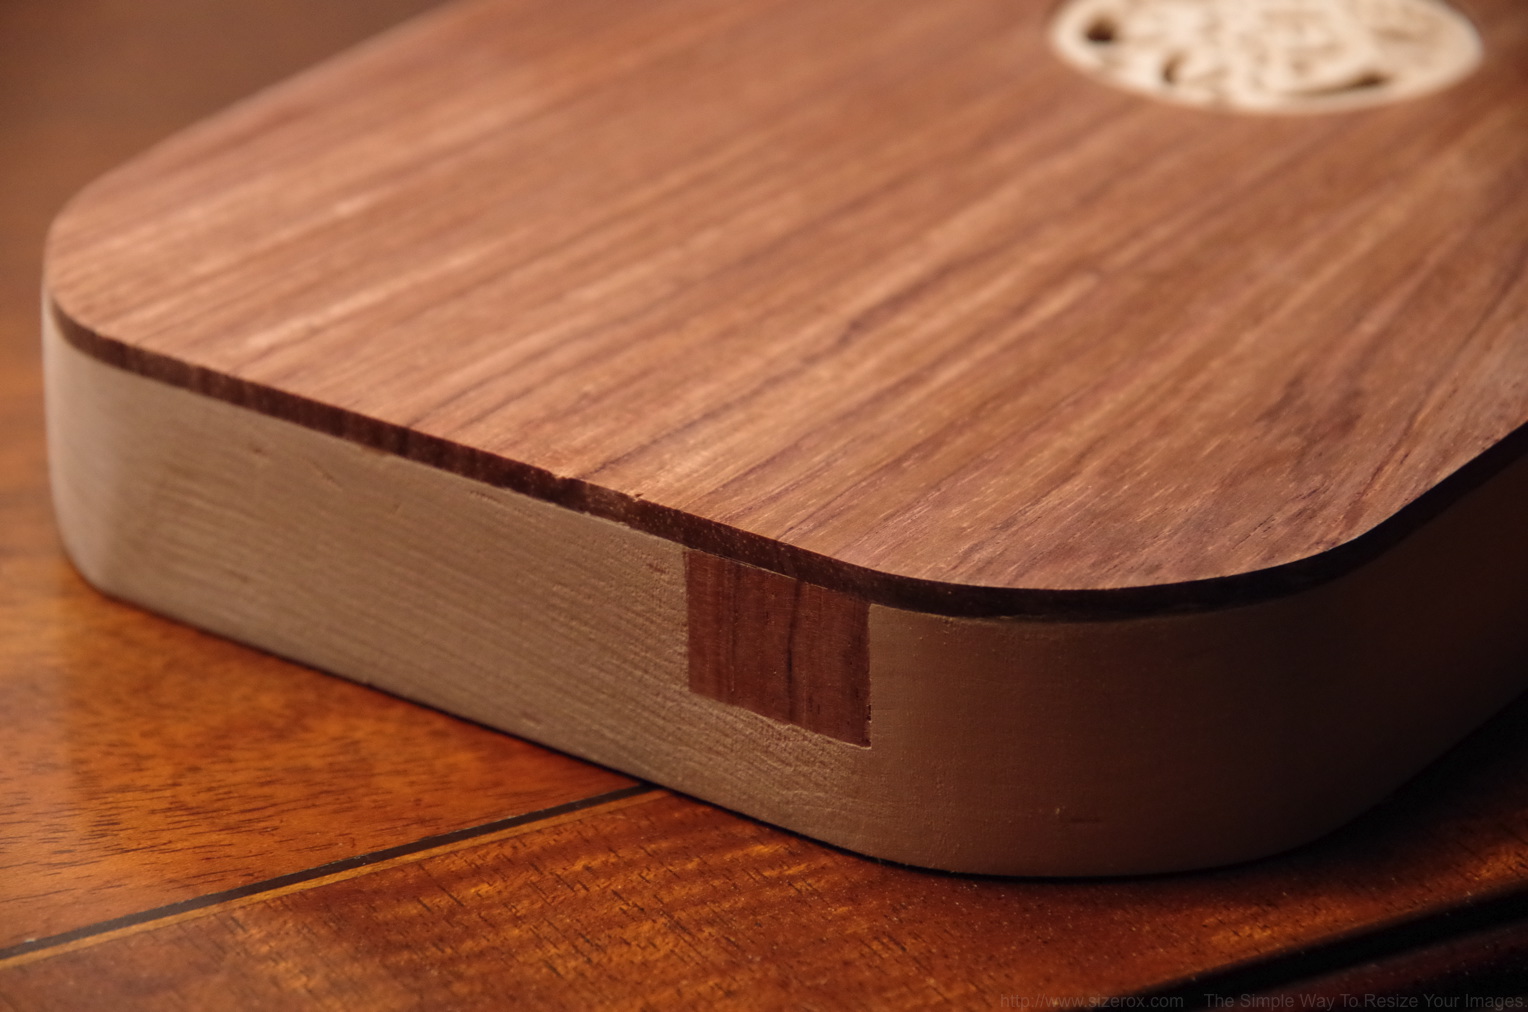
You can see that it’s pretty well seated. There’s a little daylight, but I filled that with epoxy. All the main structural joints are epoxied. The base of the lyre is going to anchor the force of the strings, like the anchorage of the Brooklyn Bridge. So the main counterforce, it seems, has to be against tilt (or roll). So I decided on a bridle joint. I also wanted a lot of exposed long grain for glue.

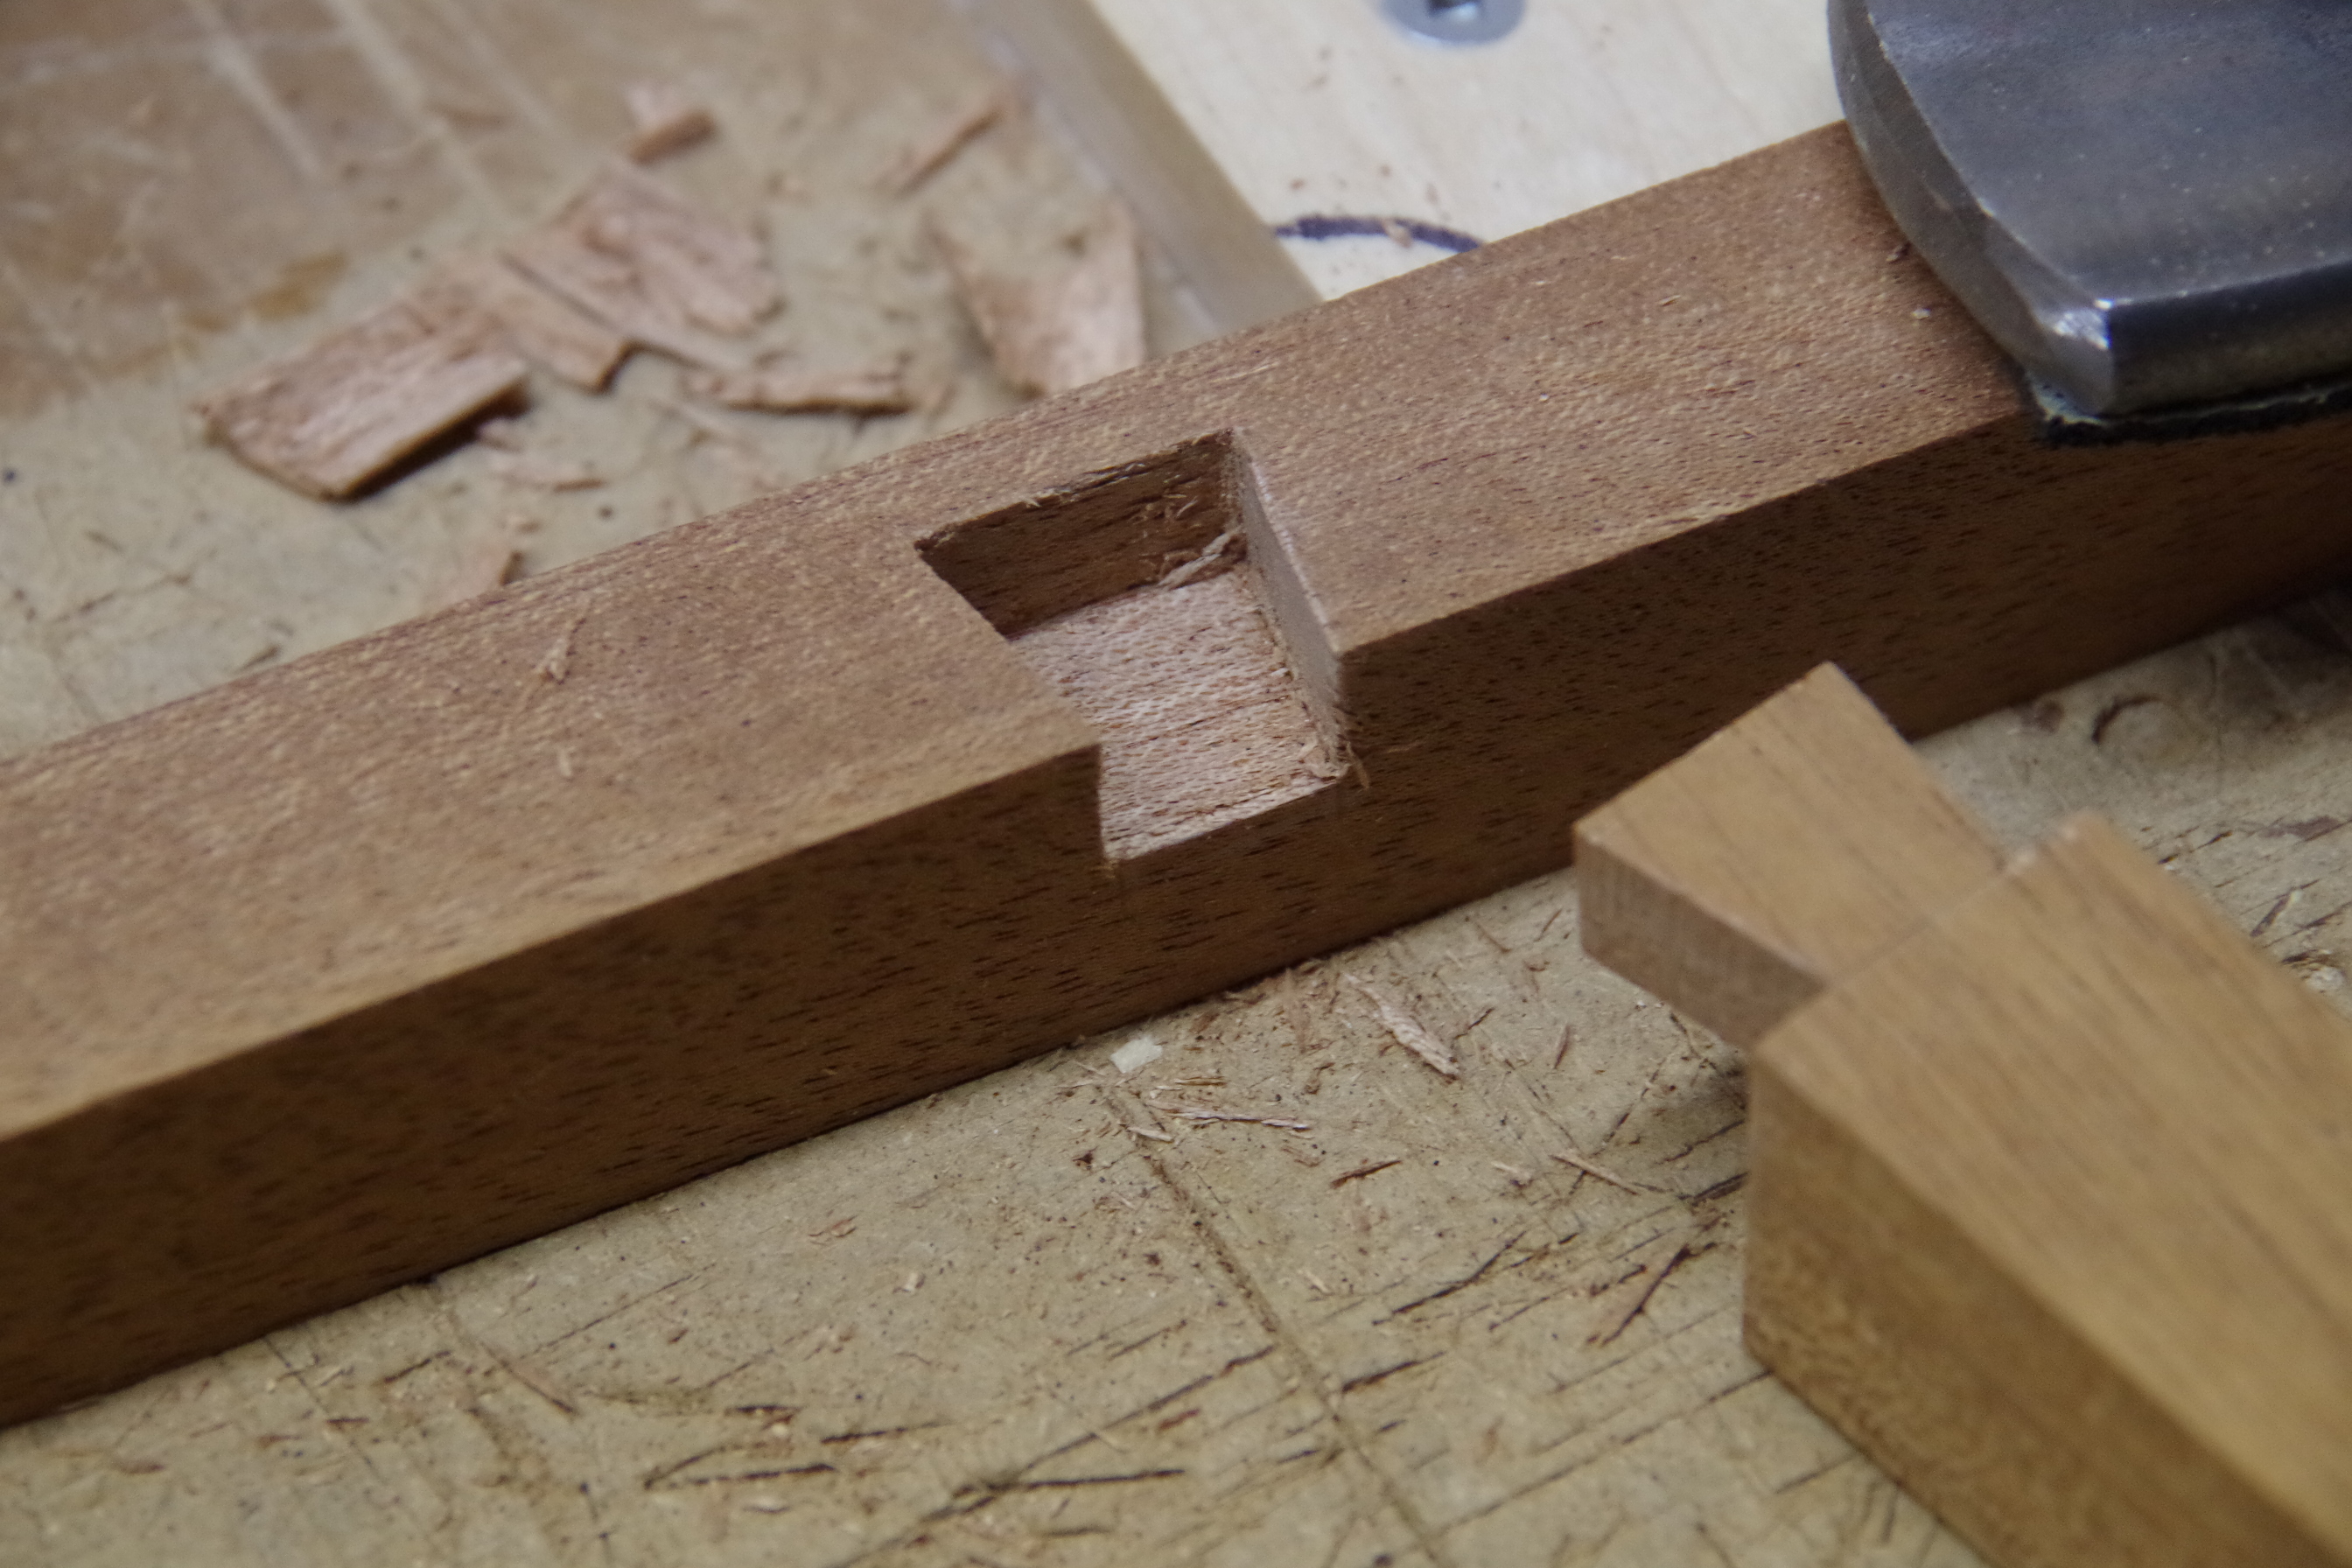
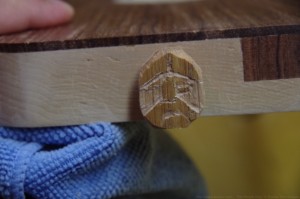
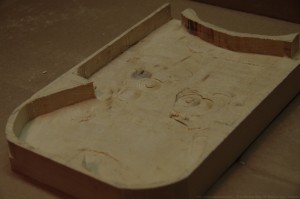
I kept the proportions of the joint to thirds, which left enough wood to sustain the pressure. Even with as hard a wood as mahogany, I wouldn’t make the frame any thinner. Next, I wanted to reinforce the base with a secondary brace that would also support the bridge. To counteract both tilt and torque, I decided on a half-lap dovetail to secure the brace to the sides, and mortise and tenon to secure the stiles.

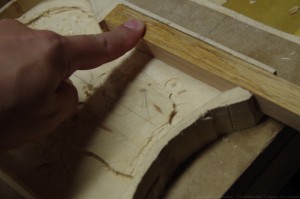
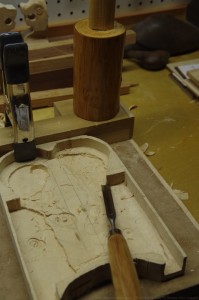
Here you can see the seating for the half-lap dovetail:

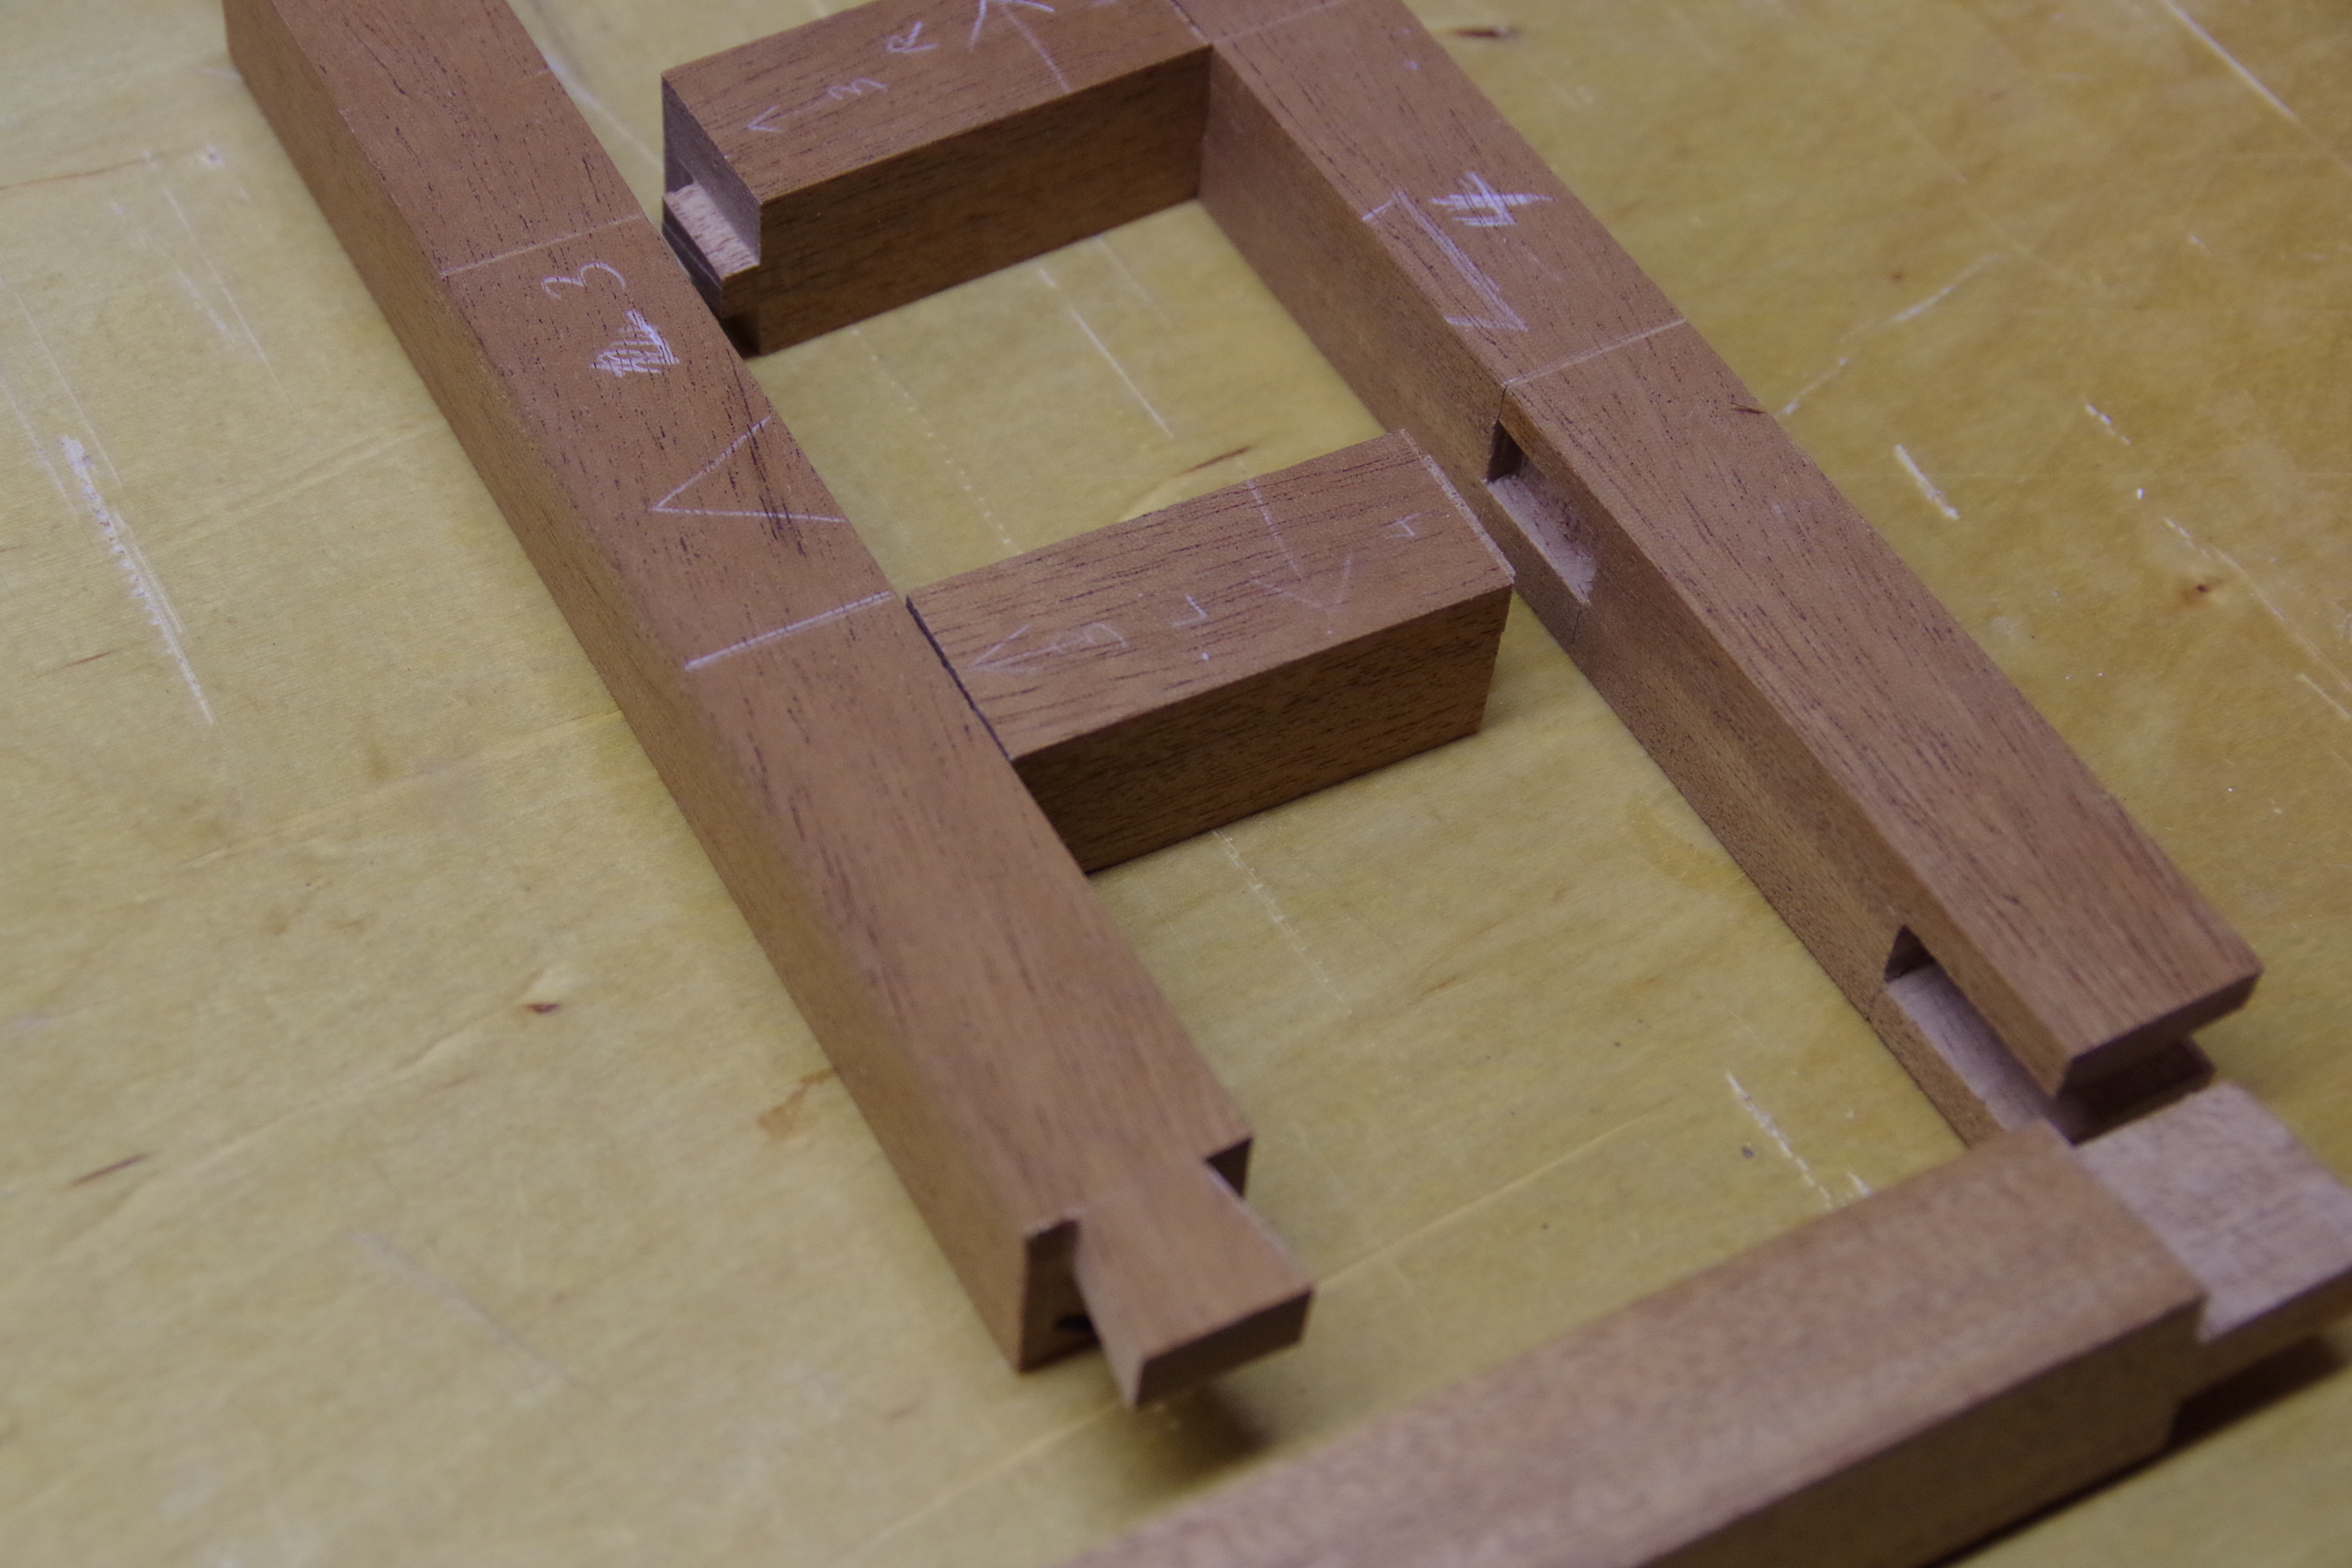
It’s a lot of chisel work! But mahogany is gorgeous to work with. Here is the entire base architecture just before glue-up:

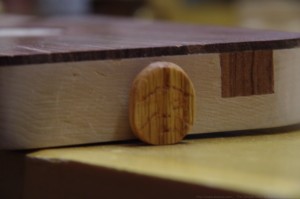
I used regular wood glue for the crossbrace assembly, since the joints are doing most of the work.

But just to be sure, I added dowels:

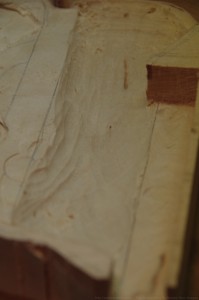
In the picture above, you can also see the mahogany skin. I skinned one side with 1/16″ mahogany veneer. It was too thin to support anything structurally, so I put nto a series of very thin supports. These were walnut. I wanted something with closer grain than mahogany, both to avoid splintering and to carry high-frequency sound more efficiently.

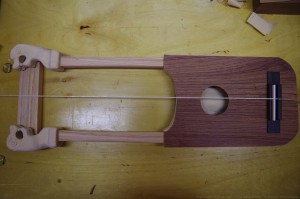
Here is the frame with one side of skin:

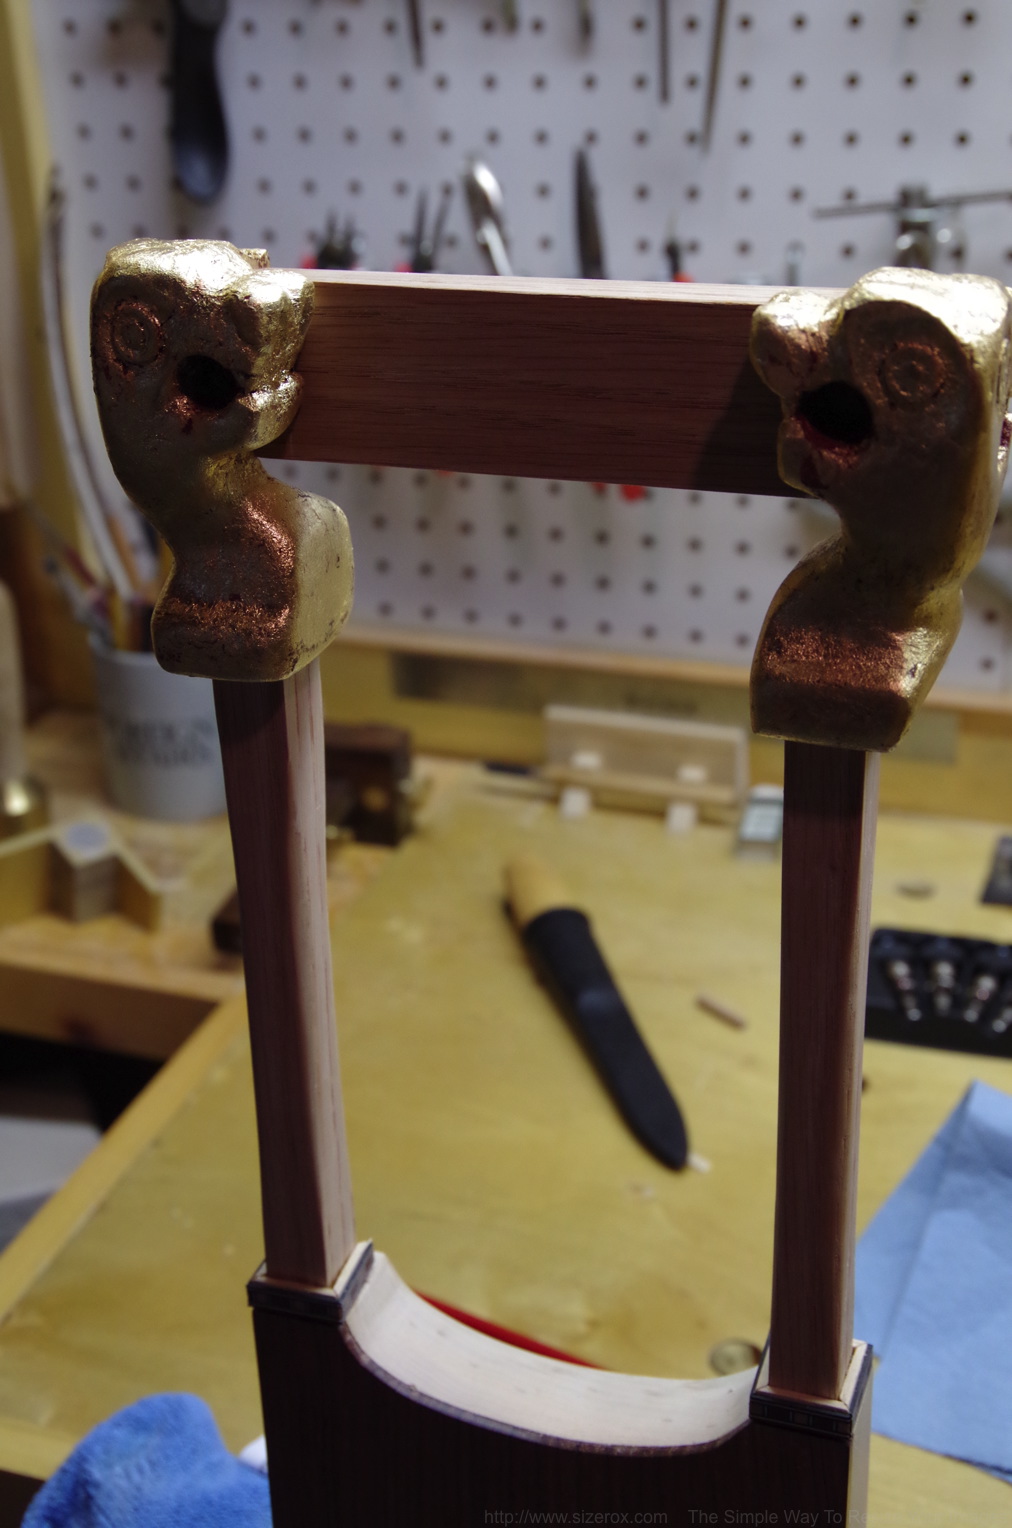
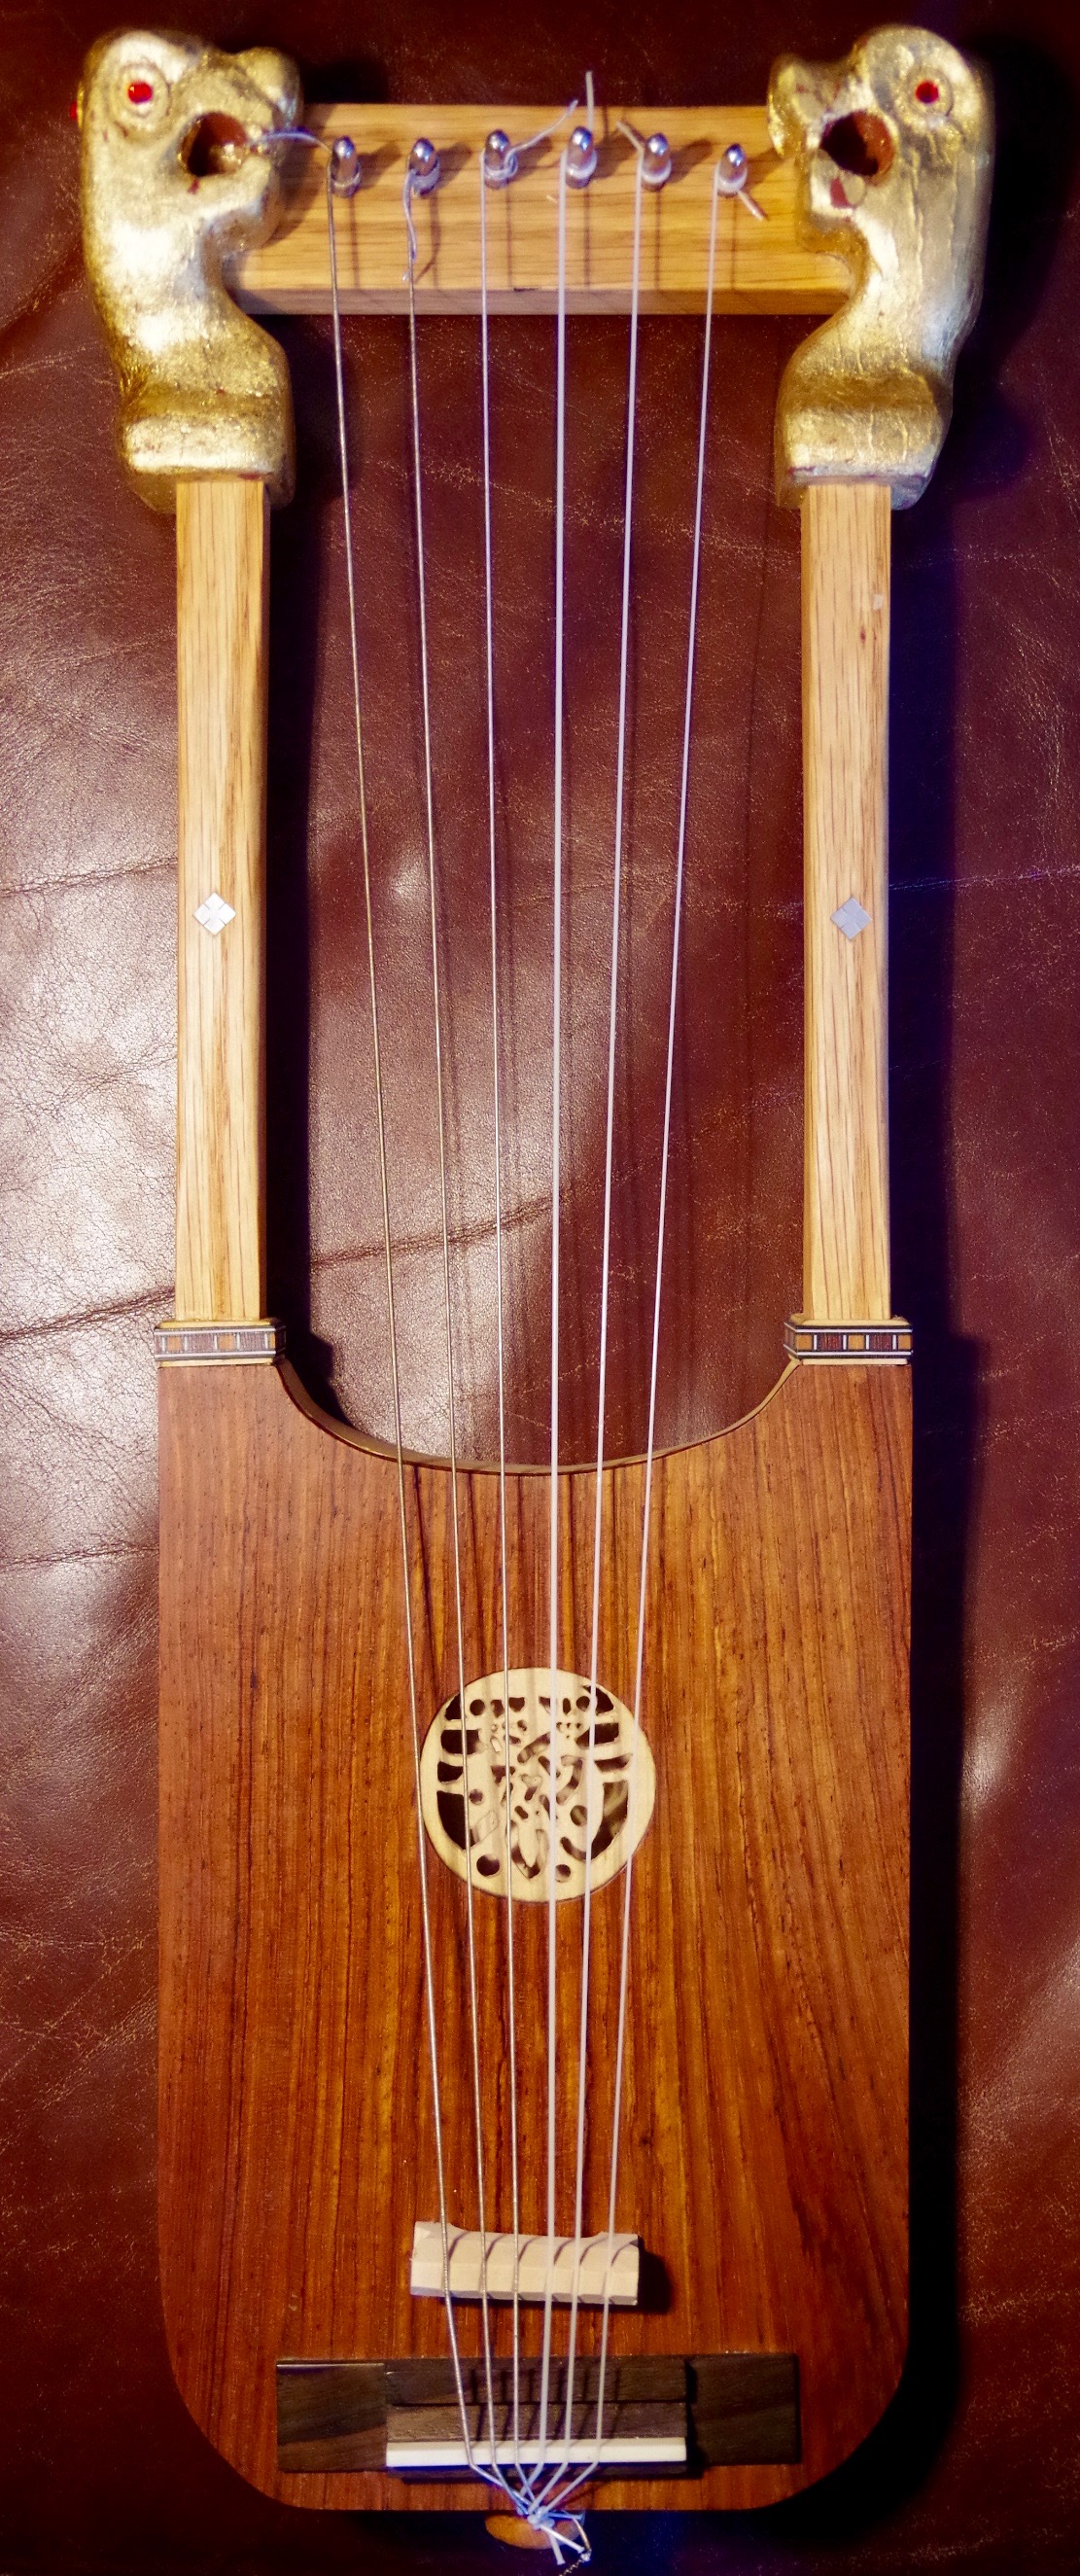
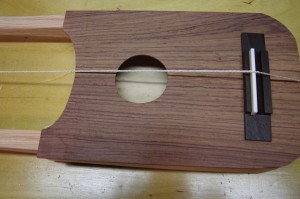
After all that work and all those beautiful joints, one is tempted to show it off–very Greene & Greene! But a clean aesthetic demands otherwise, so I hid the joinery. I don’t have pictures of carving the headstock, but you can see it in the following video. (I made the video so you can hear the sound.) The saddle is a strip of walnut that spans the mahogany skin and supports a mahogany bridge. The tailpiece is mahogany and clutches the body like a c-clamp. The strings are sent through holes and their ends are tied, like a classical guitar. The tuning pegs are zither pegs, tuned with a handle.

The tuning is CDGCDG. I came up with the rhythm and melody so that the music would match the syllabification of Caedmon’s Hymn, caesurae included. Here are the first four lines (click link to watch video):

SerpentineLyre Small

Anglo-Saxon lyre 3

Last day on the lyre. Zither pins go in when I decide on 4 strings or 6. Just a few odds and ends left. (Latin camp was excellent. We went from Proto-Indo-European to Old Latin, looked at theme vowels in the various inflections and decelnsions, and tried to made sense of the various phonological categories of stem vowels. By the end of the second day, we were reading Bede’s account of Caedmon!)

First, I painted the dragon heads with a terra-cotta base in preparation for gilding.

pic_lyre_twoHeads1

My penurious Scots soul wouldn’t allow me to spend heavily on real gold, so I bought a cheap-o set of gilding materials from the Mona Lisa company. The glue was terrible, and the gilding is a composite, so it doesn’t act like real leaf. (I may get real leaf later.) Nevertheless, it turned out alright.

pic_lyre_gildedHead

Next came the banding. I cut down strips of basswood over which I laid walnut-and-beech banding. I mitered it in a hobby miter box with a fine-toothed Japanese pull saw designed for dovetails. Glued with hide glue—very important, since it dries slowly and the miters needed readjusting quite a bit.

pic_lyre_banding

Then I fit the cross-piece into the heads with epoxy. Mighty strong glue. It’s hard to see from the picture, but the face of the cross-piece is dead center along the x-axis of the lyre. The force of the strings will pull down through the center of the heads, through the center of the posts, and onto the footrests I carved in the frame.

pic_lyre_twoHeads2

The strings attach to a peg. So it was time to make the peg. The guitar strings I’m using are attached by knots that are similar to a noose. So it seemed perfectly fitting to carve the Hanged God, Odin. Although the second picture is out of focus, it shows what a little linseed oil does to beautify the wood. One addition: I wrapped a copper wire twice around Odin’s neck and secured it. The strings then go under the wire, knotted at one end. It keeps them in place with room for all.

pic_lyre_wodenPeg

pic_lyre_wodenPeg2

And the (almost-) finished lyre:

lyre_finished1


Here it is oiled and waxed, with mother-of-pearl inset into the supports, with the strings on. Tuned to the tonic of D with bass strings at E and A. It works with a glass slide, too.

Full Lyre

Sound

Summer of 2016 will see a second lyre. This time, the back and front will be made from canary wood.

Anglo-Saxon Lyre 2

Stanchions glued in. Used yellow glue rather than hide glue since they are structural. They stood proud of the side. Foolishly, I used a #4 plane, which is as big as the lyre box, to bring down the posts. Only half-way through my first coffee, so naturally I slipped and took a chunk out of the base. Squared the damage with a chisel and inset a piece of rosewood. If I ever need a pick-up, this is where it will go. Lesson learned: small tools for small jobs.

pic_lyre_busted


So, brought down the posts with sandpaper. Checked for level and square to the sides. Finally, trued the upper ridge.

pic_lyre_level

With the posts set in place, I glued on the top with yellow glue. Sanded the sides flush to the top. Then sanded the entire box for a couple of hours, running eight steps from 80-grit up to 600-grit. Gaps are visible around the posts, so I’ll fill them, then add banding to cover the flaws.

pic_lyre_postGap


Here’s the bottom with the patch:


pic_lyre_baseFinished

And the finished box:

pic_lyre_boxFinished


Everything goes on hold now for a two-day intensive Latin Camp. We’re going to learn PIE to Latin. After all, there just aren’t enough people who can identify an Oscan epenthetic vowel in an Old Latin borrowing.

Anglo-Saxon Lyre

Taking a short break from the natural-language parser to make a modified Sutton Hoo lyre (based partly on instrucable, possibly from Rutgers). I scoured the net for ideas, but was most impressed with Michael King’s lyre. Virtually every lyre out there is a rectangle, a squared doughnut. Having played a beautiful lyre made by my friend Jul, an incredible metalsmith and artist, I thought it nevertheless slightly awkward to hold. In this version, I reduced the size of the lyre and changed its configuration. Rather than a rectangle, I decided on a sound box attached by two long stanchions to a head-piece. (I was thinking of a double-necked guitar with a bridge between the two heads.)

05

03

This is the first idea for a layout. Sound box is basswood (hard, but easier to carve than maple, the wood used in Sutton Hoo). The two upright stanchions are white oak. The cross-piece is white oak. And the dragon heads are basswood, inspired by the Oseburg ship. I carved them with a Morakniv, simply the best carving knife I have ever used. The next step was to router out the sound box. I set my router’s depth to leave 1/8th of an inch for the bottom, planning later to carve down to 1/16th. I left two posts to hold the bases of the stanchions.


09

10

The knob on the inside base is for installing a nut around which the strings will be gathered. Here’s one of the stanchions fit into place:

15

After routing, I used a gouge to bring the bottom to level. Two considerations: first, the pressure on the box is down its central axis. So, rather than put in a truss rod or brace, I left the central axis 1/8th inch thick. Second, the sound has to vibrate along the bottom, so the two sides of the central axis were carved down to 1/16th.

01

02

The result left two valleys on either side of the central axis. I splayed out the base of each valley and the result was the shape of a tree. Yggdrasil, probably. Word on the web is that when thinning panels for a sound box, what matters is not thickness so much as density. So the old way to check was to hold the bottom up to a light source and look for the “fire.” A violin maker told me that this stage is called “candellighting.” Here’s the base held up to a light. The fire-red bits are 1/16th thick.

candelight

At this point, I decided that the dragon heads would hold the cross-piece rather than mount it. Here they are carved and sanded, then holding the cross-piece:

16

04

And here’s the new layout. Note the tree-shaped interior and the rather suggestive curve of the base, which I hope will give great bottom to the sound. Seriously, I wanted the sound to bounce around in there, echoing and re-echoing.

06

The next stage was the sound hole. It’s an option, but not necessary. I decided on a hole one-third of the width of the lyre, based on a guitar by Juan Cayuela, a brilliant luthier from whose descendant I bought my classical guitar. The top is a piece of rosewood, 4″ wide and 1/8th inch thick. I glued two pieces together to make a single 8″ top. Then, I routered 1/16th from the center of the board. The result was like a dinner plate, leaving a border 1/8th inch and a valley 1/16th. The bridge is a ukelele bridge from Stewart-McDonald. They also have excellent supplies of mother-of-pearl.

08

07

The sound hole looked a little bare, so I took an idea from a renaissance lute and carved an inset. Using a design from the Book of Kells, I started by tracing the sound hole on a piece of basswood. I ripped the basswood down the middle, leaving two 1/16th slabs.

11


After layout, I carved the figure, then carved down to the circle, leaving a raised disc. It fit in very nicely. I glued the inset nto the back with hide glue:

12


And here it is from the front:

13

14

Still waiting on the tuning machines and the gutstrings. I’ve also got mother-of-peral to set in. The dragon heads will be gilded and have garnet set into their eyes. More to come.